Today we are entering the 4th week of Blogging Marathon # 27.The theme for this week is Arts and Crafts or Misc recipes.
While I would love to share some of my hobbies, I still have to catch up posting for the cooking groups that I am a part of and also the events that I am hosting. So I have opted for the Misc recipes category.
When I saw this month's recipe for We Knead To Bake, a baking group started by Aparna of My Diverse Kitchen, it sounded so simple. Yet , I baked it just on the day it had to be posted!
But one of the main things that I have to confess is that I am slowly losing my fear of baking with yeast. When I prepared the dough last night, I was quite confidant and made the dough quickly and then left it in the fridge to bake today morning.
Before the kids woke up, I was busy shaping the cookies and when Lil Angel got up, the house smelt so good that she exclaimed- ' Mom I got a yummy yum smell and I came to see what it is'! Yummy yum in her language means something that attracts her enough to eat!
After baking we couldn't keep our hands off the cookies. It was like a competition ,one trying to outdo the other. Lil dude joined in and poor guy he was sucking on the sugar coated cookies and Lil Angel was having a hearty laugh.'You better grow teeth fast', she told him and started munching on the remaining few cookies.
All in all it was a successful and tasty bake except that the first batch of cookies got stuck to the parchment paper. So for the next batch, I took them off immediately and we were saved!
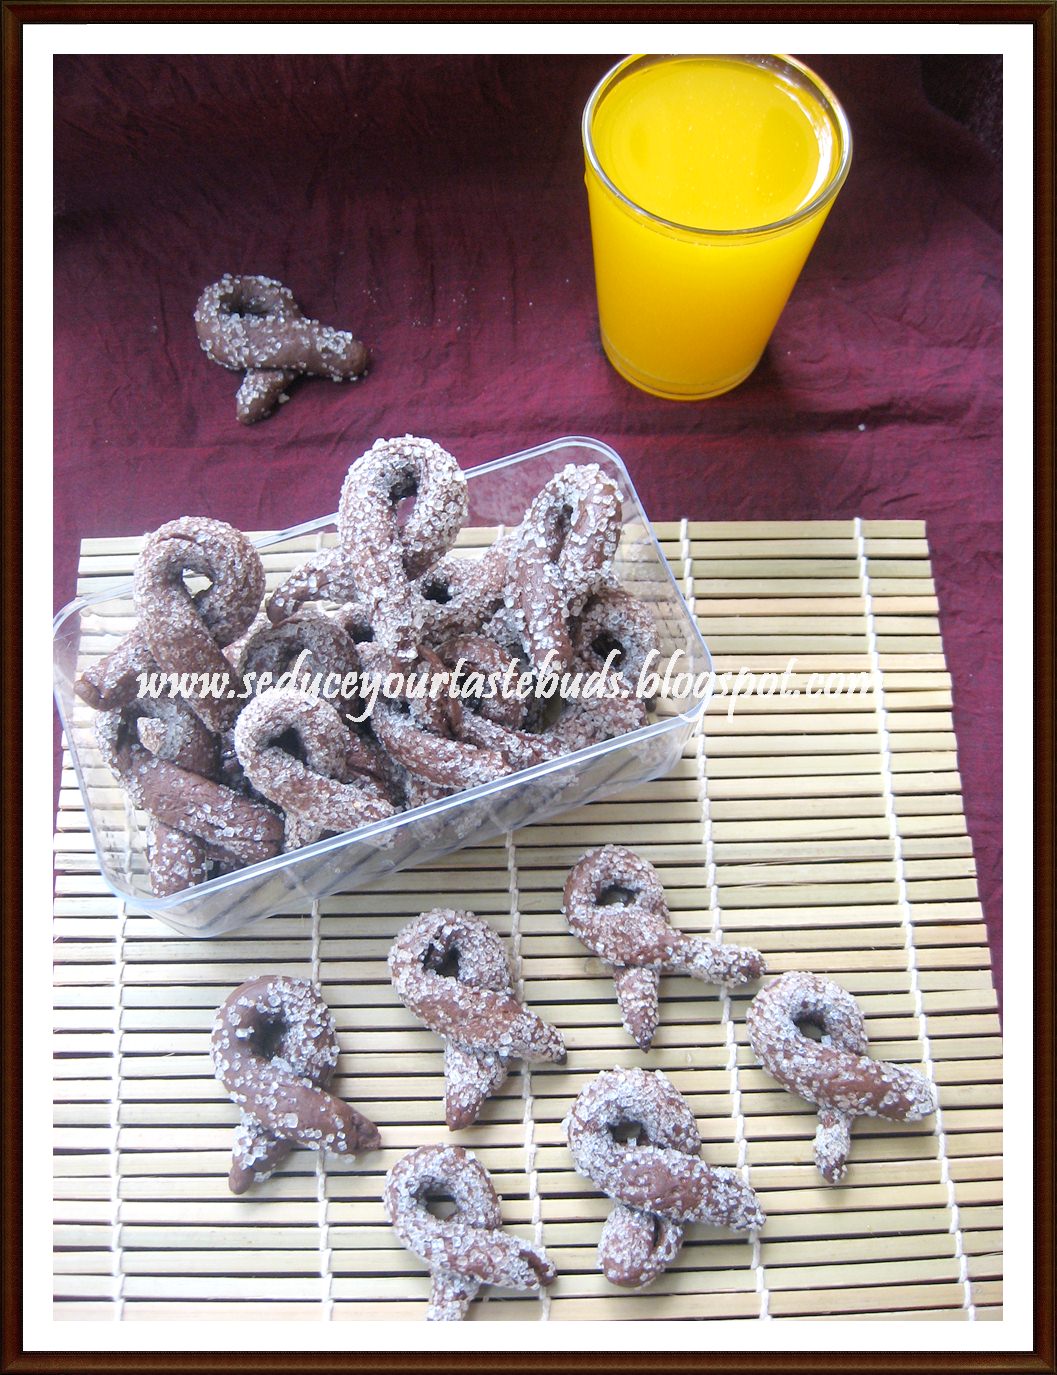
Knowing Lil Angel's love for chocolate, I prepared the chocolate version....
Now on to Aparna's note on this cookie....
Torcettini are smaller versions of Torcetti
(meaning small twists), and these pear/ teardrop shaped twists are made of a
dough of flour, yeast and butter which are shaped and then rolled in sugar
before being baked. These biscuits are synonymous with the town of Saint
Vincent in Valle d'Aosta, a small mountainous region in North-Western Italy, even
though they’re well known throughout the Piedmont region as well.
The origin of these biscuits is believed to
be from Grissini (breadsticks) which were made from the leftover scraps of
bread dough. According to one story, a Grissini baker had some leftover butter
which he needed to use up. Inspiration struck and he decided to add the butter
to the last batch of his Grissini dough for the day. To be able to
differentiate this lot of “breadsticks”, he rolled them in sugar and shaped
them into loops, and the Torcetti was born. Torcetti/ Torchettini taste even
better when they’re flavoured with lime/ lemon zest or anise.
These biscuits are crunchy, not very sweet
and pair very well with cold milk, hot chocolate, tea/ coffee or wine. They are
delicious served warm and equally good cold, and keep very well if stored in airtight
containers. Apparently, Queen Margaret, the wife of King Umberto I of Savoy loved
these biscuits so much during her stay in Valle d'Aosta, that she gave her
servants enough provisions to bake an abundant supply for her consumption.
I used:
All purpose flour - 1 1/2 cups minus 2 tablespoons
Cocoa powder -2 tablespoons
Instant coffee powder -1/2 teaspoon [ I used Sunrise brand]
Warm water - 1/2 cup
Active dry yeast - 1 1/4 teaspoon
Salt - 1/4 teaspoon
Butter - 40 grams, cold and cut into small pieces
Sugar- 1/2 cup to roll the cookies
- Dissolve the yeast in warm water and keep aside.
- In a food processor, put in all purpose flour, salt, cocoa powder and pulse for a few seconds so that they combine.
- Add the cold butter pieces and pulse some more till the mixture has a powdery look.
- Add the yeast mixture and run the processor till it forms a dough. Do not run it too long i.e. do not over process.
- Coat the dough ball with oil and keep it in a well oiled bowl. Cover and keep aside for an hour. After an hour, it would have risen but does not really double in volume.When you pinch a bit of the dough, you can see honeycomb like structure. It means the dough has risen.
- Punch it to deflate and wrap in a cling wrap and refrigerate for at least an hour or up to 24 hours.
- When ready to bake, take it off the fridge, leave it on the counter for some time and roll out into a 6" square.

8. . Using a pizza wheel cut the dough into
four strips of equal width. Cut each strip into 6 equal pieces, by cutting
across, making a total of 24 pieces. The measurements are not very critical in
this part because this just makes it easier to have 24 equal sized bits of
dough, as compared to pinching of bits of the dough.
9.Roll each piece into a pencil thick “rope”
about 5” long. Sprinkle a little sugar on your work surface and roll the “rope”
in it so the sugar crusts the dough uniformly. Form the “rope” into a loop
crossing it over before the ends.
10. Place these cookies on a parchment paper leaving about 1 1/2" gap between each cookie. They actually don't puff up too much.Let it rest for 20 minutes.
11.Bake in a preheated oven @ 160 degrees Celsius for 20 minutes.
12.Remove the cookies from the paper as soon as you take them off the oven using a pair of tongs.
13.Cool on a wire rack and serve.
Note:
- If making the plain ones, use 1 1/2 cups of All purpose flour and omit the cocoa powder and instant coffee powder.
- I deflated the dough and let it rest overnight in the fridge. The next morning, I left it on the counter for an hour and then proceeded with the recipe.
- One batch stuck to the parchment paper. Not sure if the others faced this problem.For the next batch I removed the cookies immediately after taking them off the oven using a pair of tongs.
- The original recipe calls for 1 tsp lime/ lemon zest for the plain version or orange
zest for the chocolate version. I did not use orange zest.
I will be making them again and will be trying out the plain and the chocolate version.
Labels: * We Knead To Bake, Bakes, Blogging Marathon, Cookies, Italian Cuisine, Oven Fresh Eggless Bakes